Recommended Tools & Equipment
I am often asked which tools and equipment I would recommend for crafting and running my games. That’s what this page is for! Depending on what you are looking for, I have broken my recommendations up into a few different sections:
As an Amazon Associate, I earn commission from qualifying purchases.
Also, if you see any broken links, please shoot me an email at ryanimeldm@gmail.com so I can fix them.
Crafting Tools
I primarily craft with foam, cardboard, and paper. Sometimes leather. I also dabble in 3d printing. Ooh, and recently book binding!

(These links go left to right, based on the image above.)
There are two essential blades for any foam cutting and shaping. First is the X-acto blade, which is perfect for more precise cutting work. When foam is thicker, though, I switch to the Olfa blade.
Wire brushes are perfect for adding wood grain texture.
Clay scultiping tools are really handy for shaping foam, clay, and green stuff in particular. I am always finding new use cases for these tools.
A solid carpenter square will be helpful for measuring and making straighter cuts.
Aluminum foil is a really handy tool for texturing foam and clay. Just roll them up into balls and keep them nearby.
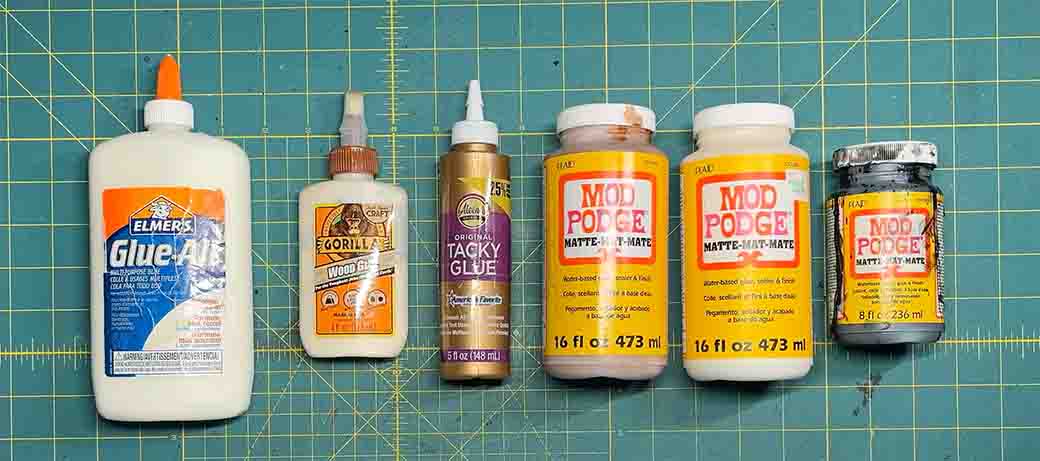
(These links go left to right, based on the image above.)
Elmer’s Glue is the most common PVA glue, and is a must-have. I recommend the stronger formula for any sort of craft gluing. You can also buy in larger quantities if you find yourself going through a lot of it.
Wood glue does wonders for gluing wood together, even in small craft projects. If you find yourself working with craft sticks or toothpicks often, give this glue a shot.
Tacky glue is another PVA glue, but it has less water in it than Elmer’s has. It provides a different type of hold (a "tacky" one), and while I don’t use it as often as Elmer’s I like having it as an option.
Mod podge is essential for any of my foam crafting work. Make sure you pick up the “matte” version to avoid any of its glossy effects. It acts as a protective layer and also a primer for painting. I like to pre-mix in either brown or black paint to my bottles, both so I can see where I have already painted the mod podge on and to get an undercoat started before I really paint anything on.
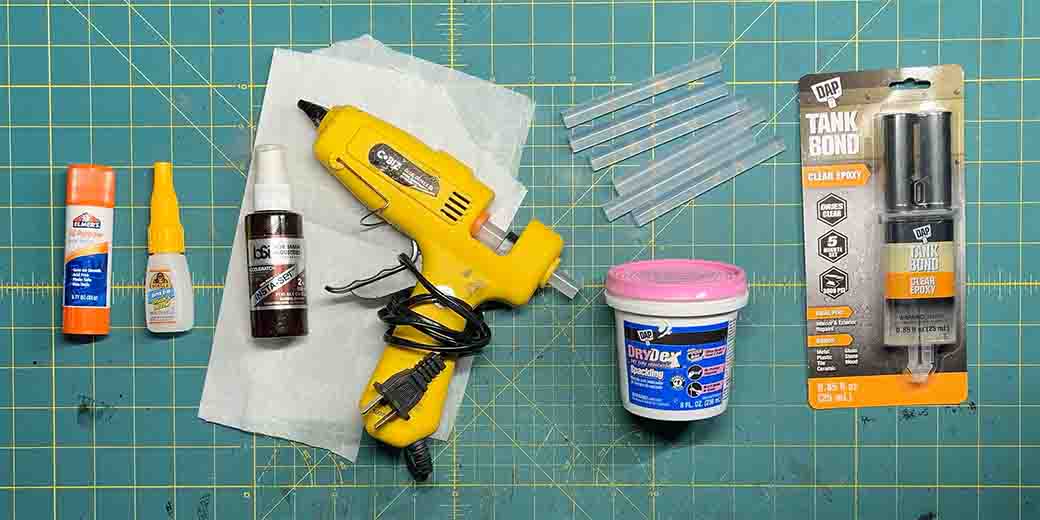
(These links go left to right, based on the image above.)
It never hurts to have a simple Elmer’ glue stick, whether for paper crafting or just sticking a quick prototype together.
Super glue, or CA glue, is sort of amazing. Especially (and crucially!) when paired with a super glue acccelerator. The 1-2 combo of CA glue and accelerator will make you feel like you can glue any two things together in seconds. Which sounded a lot cooler in my head than it did after I typed it out…
A hot glue gun will speed up a lot of crafting projects. There are a lot out there, but I recommend one with a temperature switch, so you can use a low or a high heat. Some high heats will melt your foam faster than you can glue it, and that can get frustrating.
Get yourself a stash of extra glue sticks that will fit your glue gun, and refill it liberally. You never want to be halfway through a project and run out of glue sticks. Trust me!
A small tub of spackle is fun to experiment with. This stuff is easy to work with, dries quick and doesn't shrink, and is great as a general purpose filler on so many craft and terrain projects.
A clear epoxy resin in a syringe like this is the simplest way to apply resin to a project without having to mix up a big batch of resin. Most of the resin that I have ever added to a craft project came from a syringe like this, actually.

(These links go left to right, based on the image above.)
I am always happy to have some chipboard on hand. Sometimes it’s just for making templates or testing out an idea, and sometimes it acts as the substrate for an entire build.
White foamcore boards are the best way to get started building with foam. You want to make sure you get the kind where you can easily peel the paper off of each side.
XPS insulation foam will be the next type of foam you want to try. Your best bet is to pick up a large sheet of it from a hardware store, once you know you want to work with it a bunch.
Dowel rods, toothpicks and craft sticks are always helpful to have around.
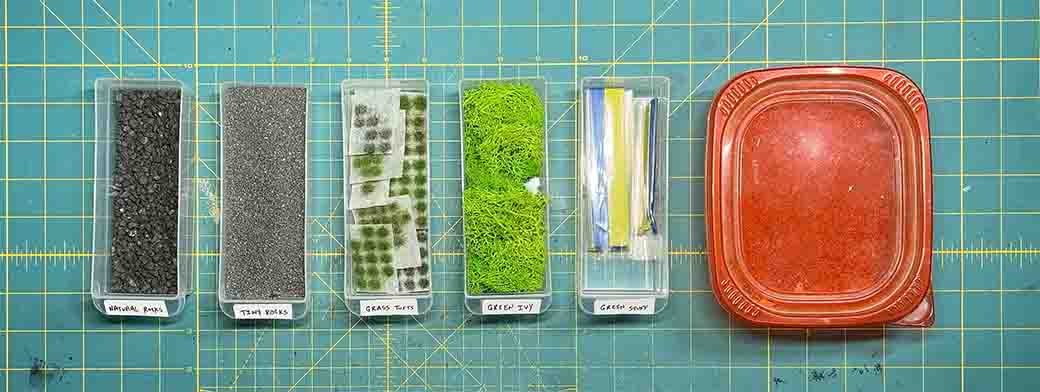
(These links go left to right, based on the image above.)
Little stones and pebble are great when you need some chunky dirt in your build.
This fine rock provides a helpful contrast to larger rocks when mixed in.
Grass tufts are super useful, and there are a lot of varieties available.
Colorful moss can be really helpful, and it tends to stretch a long way.
Green stuff has a lot of sculpting uses. Some people even use them to sculpt miniatures!
This makeshift red tub has an irregular mixture of sand, the same type you would put in a sandbox. This is my favorite way to add texture if I need texture across a big surface.
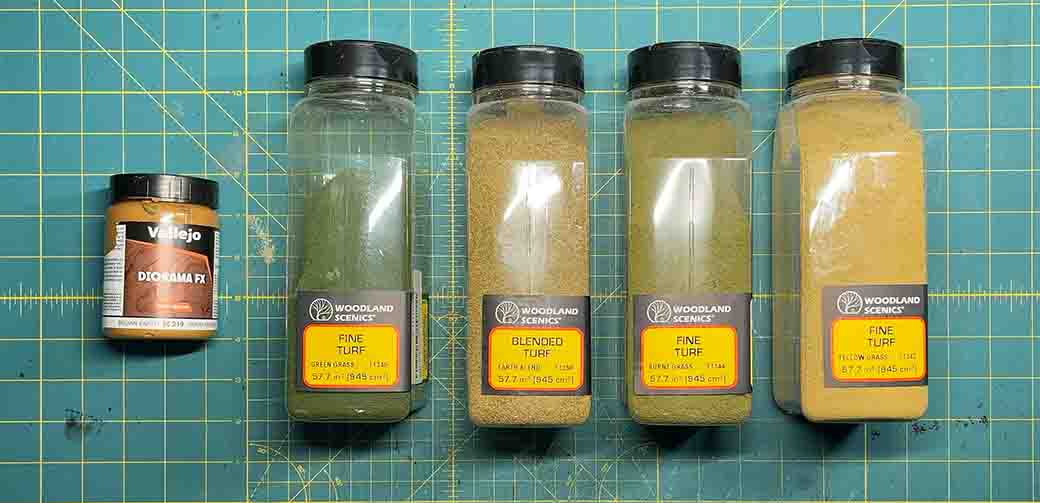
(These links go left to right, based on the image above.)
I really like using Vallejo texture pastes like this earth mixture. It is really helpful for touching up projects or dropping in quick texture that dries pretty quick too.
Each of these flocks from Woodland Scenics is really useful for adding a natural texture to builds. I particularly like mixing them together in cups in different ratios based on the setting of the build. These will last a long time too. Here's a link for the fine green turf, the blended earth, the burnt grass and the yellow grass.
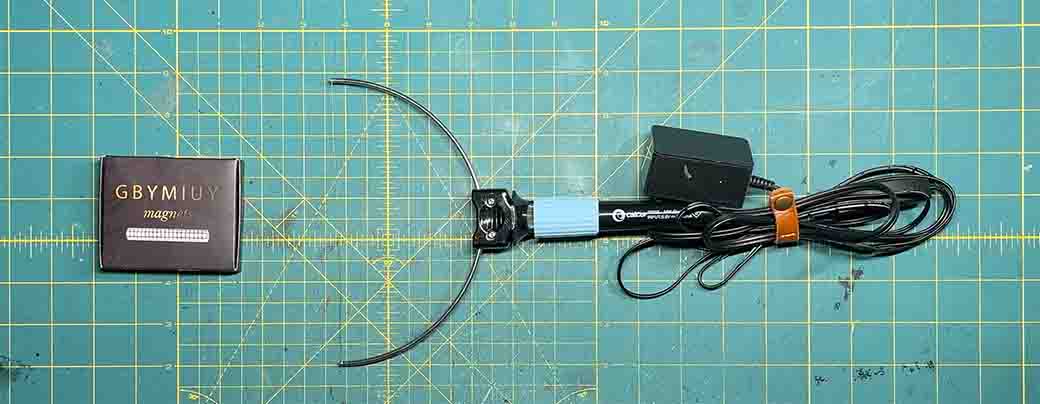
(These links go left to right, based on the image above.)
I prefer a 6mm magnet, and use them in most of my craft projects.
A handheld foam cutter like this one is really helpful for cutting curves into foam in really precise ways. It has a pointed attachment that allows you to melt holes into foam too.
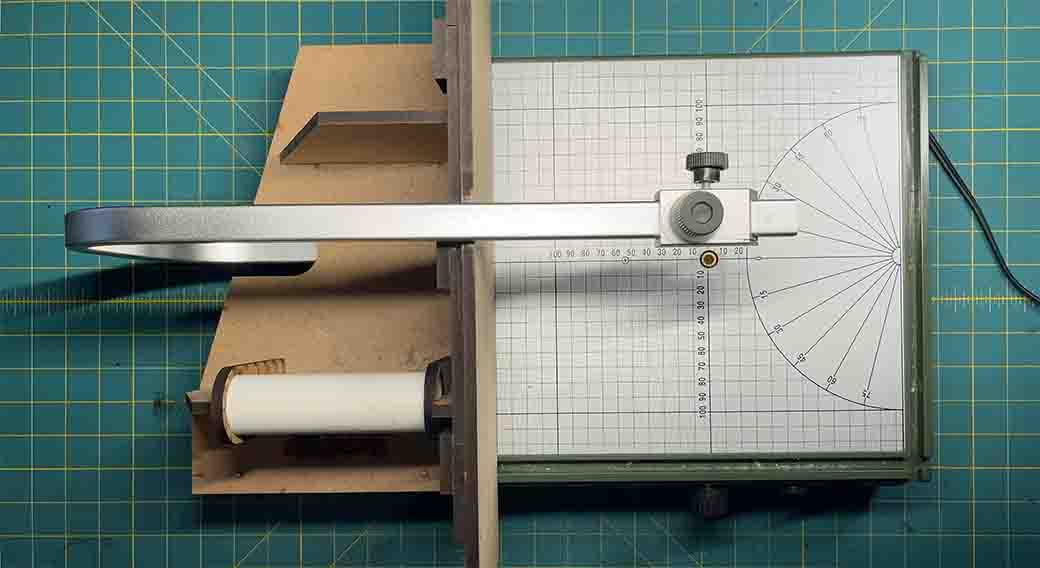
If you find yourself wanting to cut a lot of foam, it might be worth picking up a Proxxon hot wire cutter. I would also recommend grabbing the Guider Pro 2.0 from Shifting Lands, which will make it much easier to cut longer and larger pieces of foam.

(These links go left to right, based on the image above.)
I would recommend a proper mask when you are cutting foam on the Proxxon or doing any other crafting that creates dust or particles.
Rubber gloves are handy for protecting your hands when working with resin and other things you don’t want on your skin.
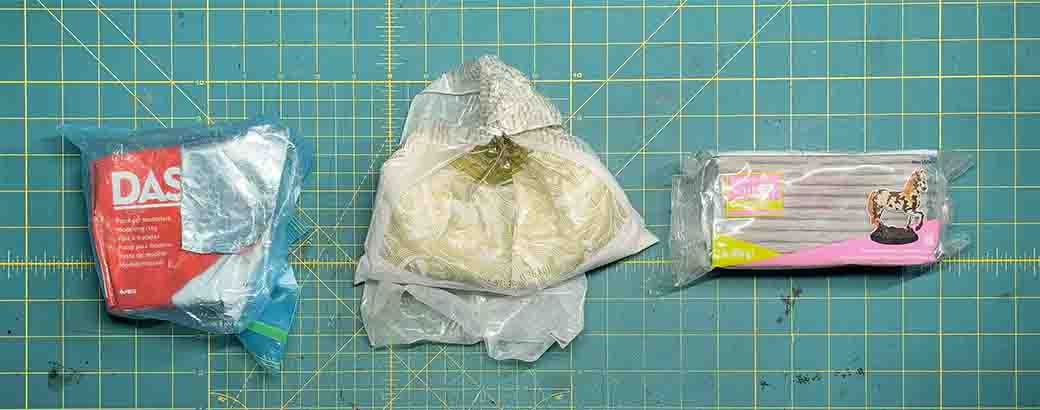
(These links go left to right, based on the image above.)
DAS clay is an air dry clay that I have found really easy to shape and work with.
Scultpamold is a bit messier, because it has to be mixed with water. But it does end up looking natural with a lot less sculpting work.
Super Sculpey is an oven-bake clay that I only have a little bit of experience working with. However, it is nice that you don’t have a ticking clock to worry about like you do with an air dry clay. You can spend as long as you need to sculpting it, since it’s only final after you bake it.

(These links go left to right, based on the image above.)
For painting terrain and crafts, you don’t have to spend very much. Craft Smart, Apple Barrel and DecoArt Americana are great cheap acrylic craft paints.
You will want a dedicated pot for water for your brushes. I prefer to use this Citadel water pot.
Get cheap brushes! Painting with mod podge and dry brushing foam will tear up your brushes. Buy the cheapest stuff you can find, that way you won’t care when you burn through after a few projects.
After painting up a craft, I will hit it with this Krylon Matte Finish spray to add an extra protective layer over the paint. This helps to prevent damage from wear and tear over the years.
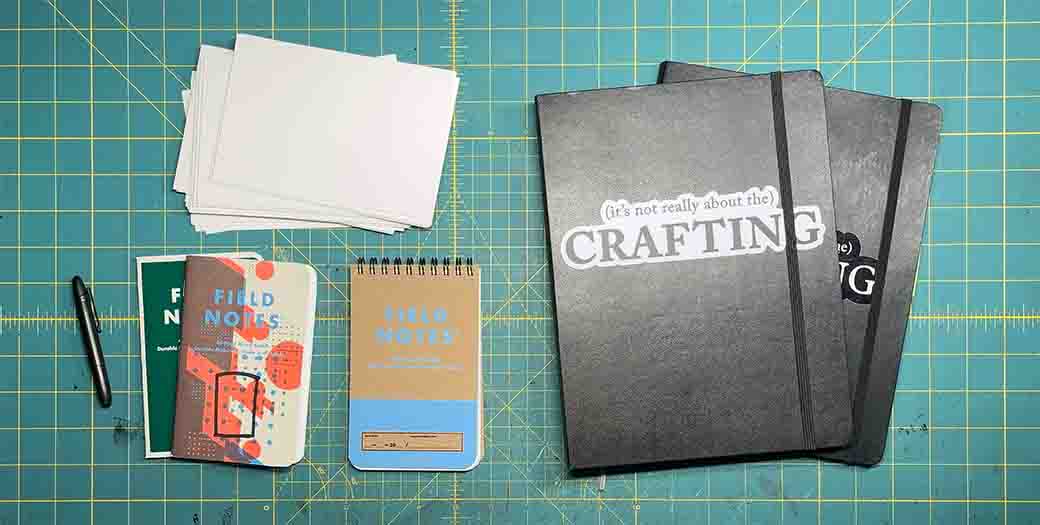
(These links go left to right, based on the image above.)
I love Fisher Space Pens because they fit easily in a pocket. I like to carry a pen and notebook with me most of the time.
I am a huge fan of Field Notes notebooks. They are useful for almost anything, and the art and variety is refreshing.
I love having notecards handy almost as much as I am frustrated when I reach for some and realize I’ve run out of them.
Dot grid notebooks are great for taking notes and drawing out plans for crafts and dungeon designs. They are available in hard cover and soft cover versions.
(Also, if you like that Crafting sticker on the front, you can always pick up a set of stickers from my shop.)

(These links go left to right, based on the image above.)
The 8 in. x 6 in. vintage paper is one I used in some recent notebook build projects.
It is weird that there is a string threaded through this stack of papers, but I usually just remove that edge of the paper and then use it anyway. It has a great texture.
I like the texture on this loose watercolor-ready paper.
These last two have similar parchment colorations, and are useful for differentiating, for instance, papers on a notice board and making sure they don’t all look the same.
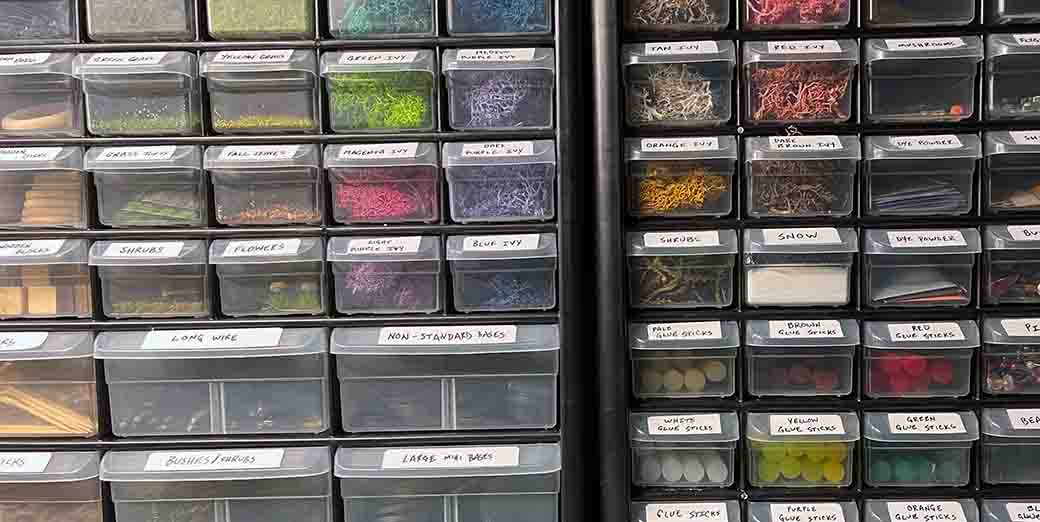
These craft drawers have transformed how I use my crafting supplies. They are made out of plastic, and there are a few different sizes, but I linked up the one that I use. I have two of them, and it gave me a way to pull my crafting supplies up out of tubs and into a these clear visible drawers right in front of me.
Plus, I can pull one out and use it in my crafting space. You can see them in some of the photos up above.
Miniature Painting Tools
I really enjoy painting miniatures, and these are the tools I use to do it.
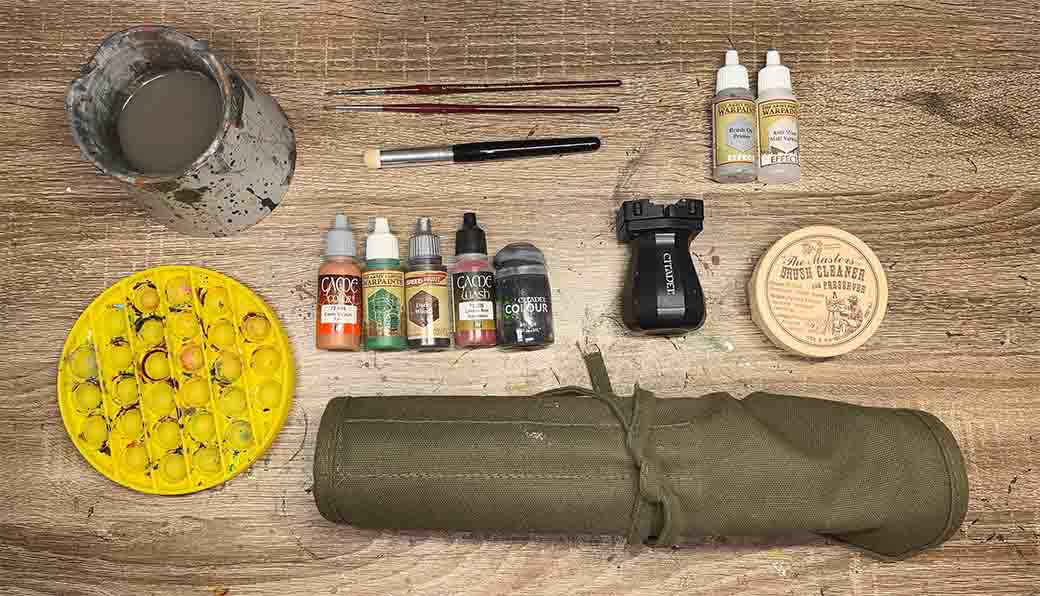
(These links go left to right, based on the image above.)
You will want a dedicated pot for water for your brushes. I prefer to use this Citadel water pot.
I pretty much exclusively use these popper toys as paint trays at this point.
I like to spend a little bit more on miniature paint brushes, because they usually do make a difference when painting.
I prefer using this brush-on primer because I can prime miniatures right at my crafting table without going outside to spray them.
This anti shine matt varnish is also a great way to protect miniature paint jobs from any sort of regular wear and tear.
I use Game Color paints, Army Painter paints, Army Painter Speedpaints, Game Color Washes, and Citadel Shades.
I use Citadel painting handles to hold my miniatures while I paint.
This brush cleaner is a good way to preserve nice miniature brushes.
I keep the paint brushes I use in this canvas roll up holder.
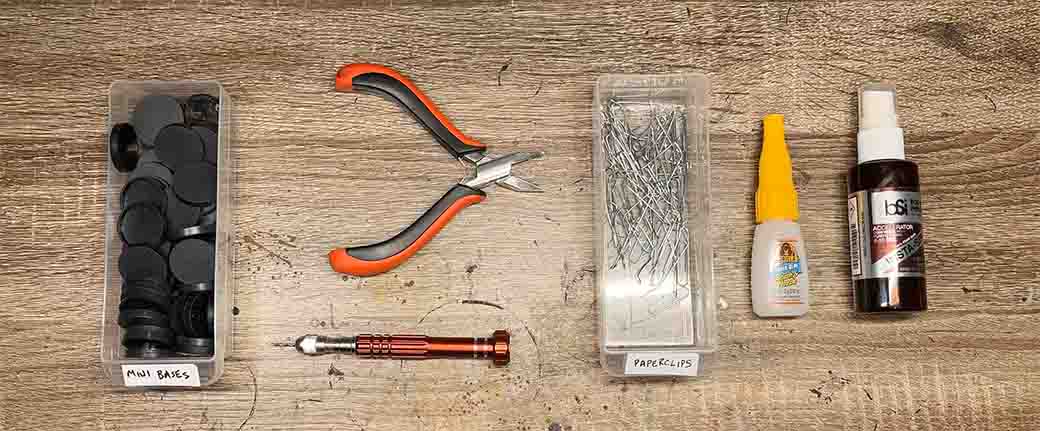
(These links go left to right, based on the image above.)
I am a fan of the 1 inch Reaper miniature bases because they have a little bit of depth underneath so I can pin minis to them.
These precision cutters are great for cutting things like paperclips to pin minis down.
This miniature and model drill is how I put little holes in miniatures and bases to glue and pin them together.
Simple paperclips are the perfect way to pin miniatures down to bases.
Super glue when paired with a super glue acccelerator makes basing miniatures a lot easier to do.
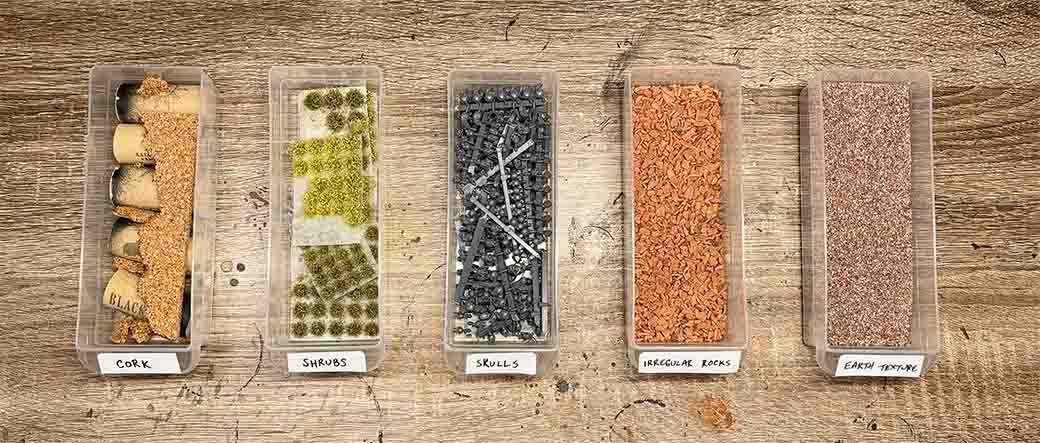
(These links go left to right, based on the image above.)
Cork is a really useful basing material.
These grasses and shrubs are perfect for decorating miniature bases.
These little plastic Citadel skulls are great decoration for evil miniatures and scenes.
These irregular rocks and earth texture are both great ways to glue down a ground base for miniatures.
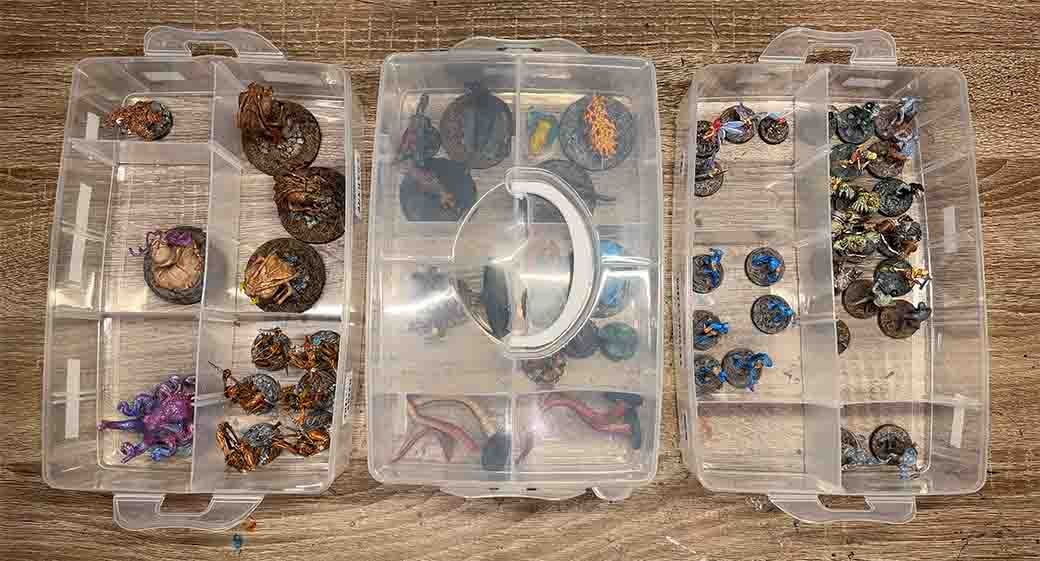
These stackable storage containers are my preferred way to store painted miniatures.
Game and DM Tools
I don’t have a ton of tools for running the game. I have plenty of terrain, but those are all hand made using the tools listed above. Most of these are simple items that I use all the time, and a few books that I really like.

(These links go left to right, based on the image above.)
These miniature trays make it easier to move groups of minis around on the table.
My metal d20 that I use for all dungeon master rolls has to be rolled exclusively in a rolling box. It is dangerous. But it is awesome.
I don’t use my d100 every day. But I probably fidget with it at my desk every day.
My dungeon master dice is exclusively made up of easy to read yellow Chessex dice.
I like these condition rings for marking the status of a character on their miniature.
These initiative markers are great for setting up turns visually at the table.
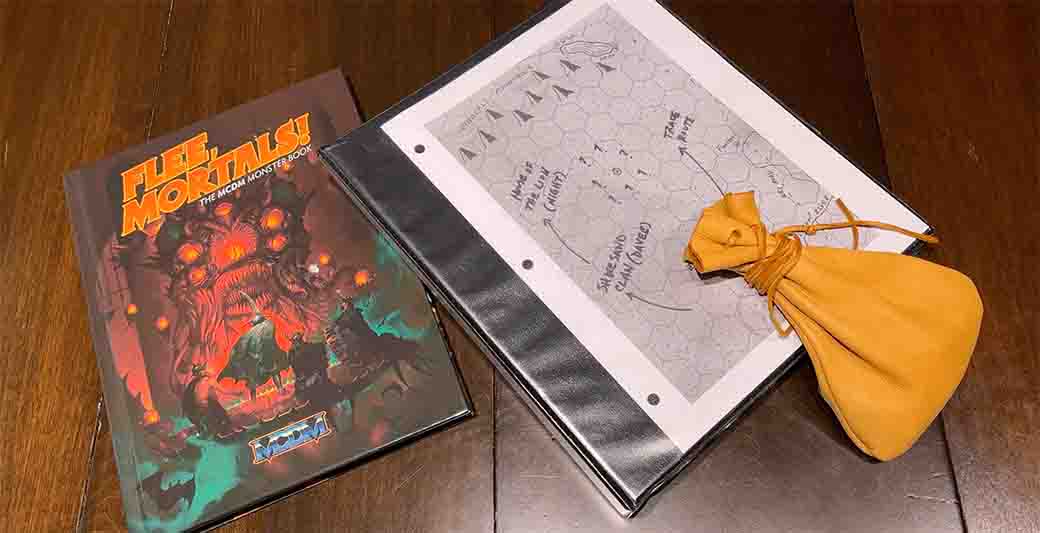
(These links go left to right, based on the image above.)
Flee, Mortals! The MCDM Monster Book is my current favorite monster book for D&D.
I use these 1.5 inch 3 ring binders to organize my campaign notes.
My dice bag is a deerskin leather bag from Etsy.
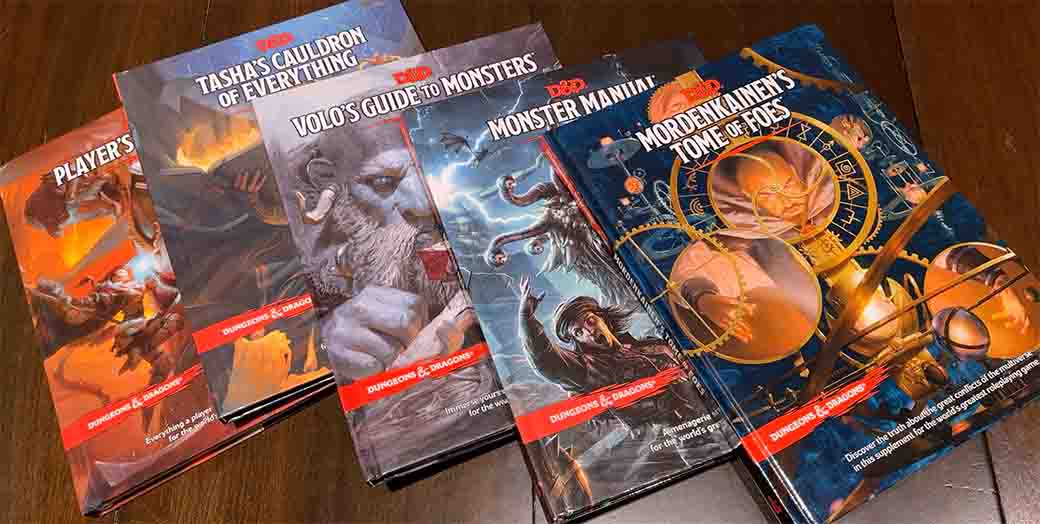
I am a fan of the 5e books in the picture above:
- The Player’s Handbook is a pretty good way to get started buliding a character in this hobby.
- Tasha’s Cauldron of Everything has some amazing puzzles and ideas hidden in there.
- I like the monsters in Volo’s Guide to Monsters.
- The Monster Manual is the best official release from Wizards of the Coast for 5e.
- Mordenkainen’s Tome of Foes is also a great source of monsters.
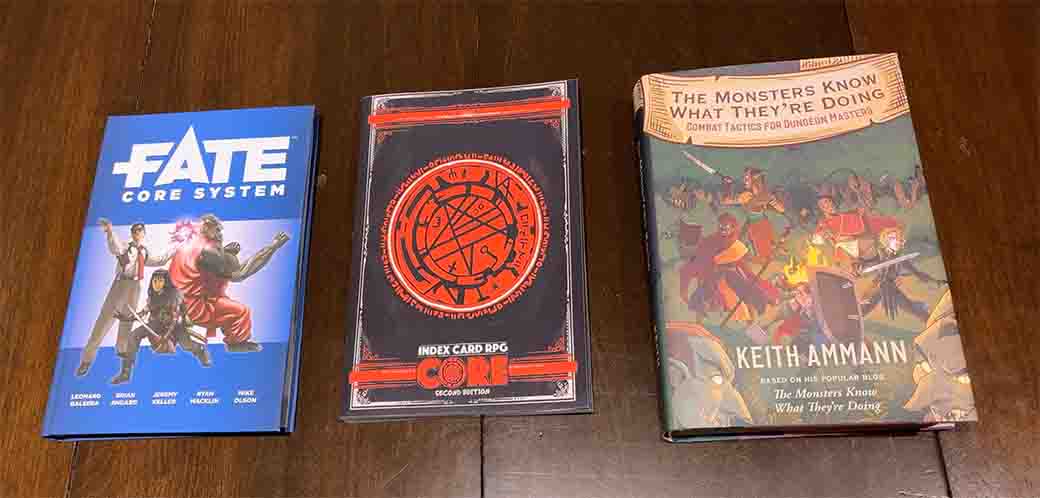
(These links go left to right, based on the image above.)
Fate Core System is a game I have heard a lot of good things about. One of these days I will run a game using it.
I am a huge fan of Runehammber and Index Card RPG has some amazing ideas in it.
The Monsters Know What They’re Doing by Keith Ammann is a wonderful research for learning how to run monsters in a more believable (and challenging!) way.
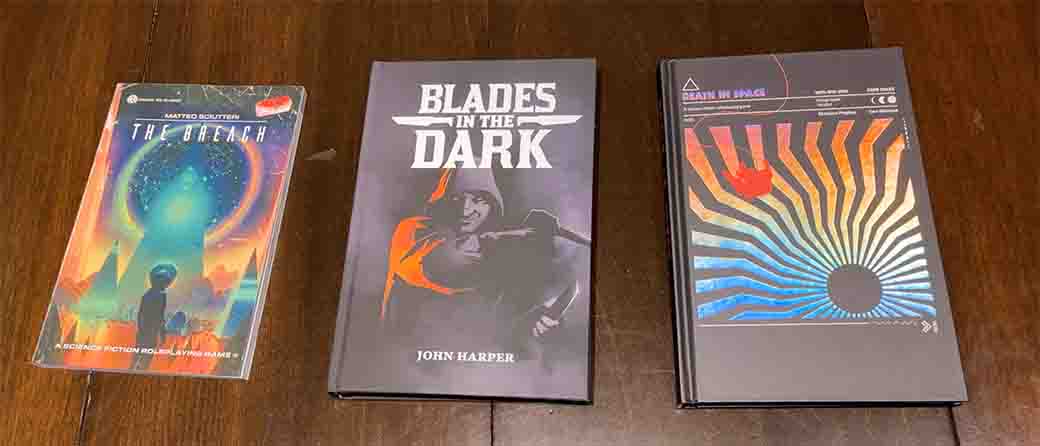
(These links go left to right, based on the image above.)
I love the vibe of The Breach, and how much the design of the book communicates that vibe. I hope to run this game some day.
Blades in the Dark is high on my list of new TTRPGs I want to try out.
While I have not run it yet, Death in Space feels like exactly the type of tone I want in a space travel RPG.
Streaming and Video Recording
If you have ever caught my streams, or wondered about what I use to make my videos, I have listed some of my equipment below.

(These links go left to right, based on the image above.)
I love my Royal Kludge mechanical keyboard. It’s a bluetooth keyboard which this fun little dial on the upper right that I can use to toggle between different devices. It’s really fun to toggle it back and forth.
The Logitech MX Master 3S mouse has a bunch of programmable buttons that are helpful when editing photos and videos. (One heads up, though, is that AirPods can conflict with the bluetooth signal of the Logitech. This issue can be avoided by also picking up the Logitech USB receiver. It is a little annoying, but it’s a great mouse, so I deal with it.)
These coasters are laser engraved from Arcanic Artistry.
I use this coffee mug warmer.

(These links go left to right, based on the image above.)
I am a big fan of Stream Decks. I have used both the Elgato Stream Deck and the Elgato Stream Deck XL, and both are great.
I use this 4k Video Capture Card to bring in different sources (like my gaming laptop) from HDMI to USB3.
This is the Philips 4 Device HDMI switch that I use to switch which device is displaying to my second monitor.
My headphones are Sennheiser HD 280 Pros.
There are also some pieces of technology I use that I do not have pictured above. They are:
- I use a Rode Procaster dynamic microphone.
- My mic is attached to a Rode swivel mount boom arm attached to the wall with a vertical surface mount.
- I use a simple pop filter attached to the boom arm.
- My mic goes into an M-Audio AIR USB C Audio Interface to send my XLR signal into my computer.

(These links go left to right, based on the image above.)
I use these Gooseneck Tablet Holders to hold my camera phones in place while I record and stream my work.
I use this phone tripod when I'm recording and need to hold the phone still in awkward positions.
Broken Links?
If you see any broken links above, please shoot me an email at ryanimeldm@gmail.com so I can fix them.
Join my email list
I will only send emails to this list when I launch a new project worth talking about. I won’t use your email for anything else.

